RV underbelly care? Is there really anything RVers need to be concerned about “down there”?
Each season when RVers prepare the RV for spring and their first outing, most are diligent about walking around their rig to check the lights, tire pressure, window seals, etc.
A good percentage of RVers also climb up on their RVs roof to check the roof seals, conditions of the plastic vents, lube the TV antenna, etc.
However, very few take the time to crawl under their RV.
Why should they? To check the condition of items like shocks, frame components, holding tank mounts, exhaust system, and other components.
7 RV Underbelly Care Inspection Points to Check Annually
When it comes to RV underbelly care, out of sight, out of mind is how most RVers respond. After all, what can happen down there, right? Well, plenty! Here’s why every year you should pay attention to the top 7 RV underbelly inspection points.
Underbelly Inspection Point #1: The RV Frame
The frame supporting the living portion of most RVs is made of welded steel. While strong, steel and welds can experience fatigue. This can lead to cracks and eventually, failure.
All the flexing and twisting that occurs while bouncing down today’s aging highways and byways can really take a toll on the frame of your RV.
Enough flexing can eventually lead to welded or bolted joints breaking. Once a year or before an extended RV trip, get under your RV and inspect all visible joints for developing cracks.
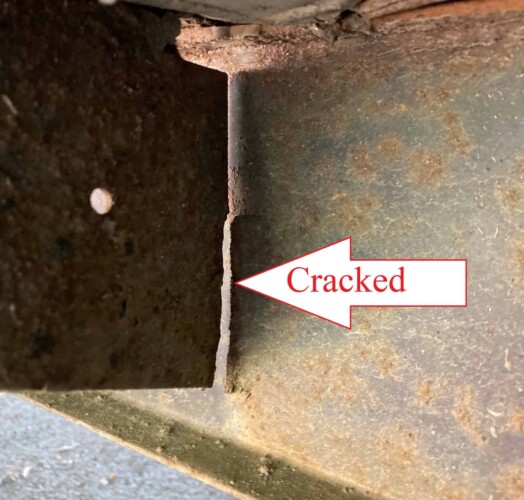
My 12-year-old travel trailer suffered metal fatigue. It happened on the steel flanges that support my below-floor fresh water tank, which fell out on one trip. Metal fatigue also happened on an outrigger and on the A frame tongue.
Luckily, I spotted the cracks in the A frame before complete failure occurred which could have been catastrophic. Read about my experience here.
Another spot on the RV frame to pay special attention to is the steel brackets that support your holding tanks. Gray and black water sloshing around in the holding tanks can place a lot of stress on the supports.
Trust me, it is not a pretty situation when a support fails, dropping the contents of your holding tank in the middle of the highway.
Underbelly Inspection Point #2: The Entire RV Underbelly
Any point where your RV underbelly material has been penetrated for utilities to pass through should be inspected annually.
- Factory sealants will eventually dry out or separate from the underbelly, leaving an opening.
- Road debris can be kicked up from the road while your RV is in transit, punching a hole in the underbelly material.
- Bouncing down bumpy roads can also cause other parts of the RV to rub holes through the underbelly material.
- Another potential problem is plumbing and wiring access panels which have worked loose.
Any hole in your RV underbelly is a path for rodents and insects to enter your RV. This can lead to additional damage. The stink of rodents is bad enough, but the damage they can inflict like chewed wires is worse.
If you find a hole, seal it up immediately.
How to seal holes in an RV underbelly
- Small holes can be filled with a caulking material.
- Large holes can be sealed with expanding foam or underbelly repair tape.
- Make certain the RV glues, tapes, or adhesives you use are designed to adhere to the underbelly material.
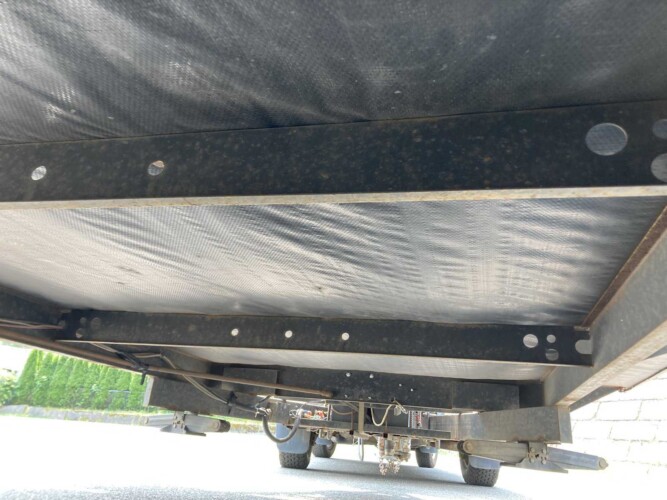
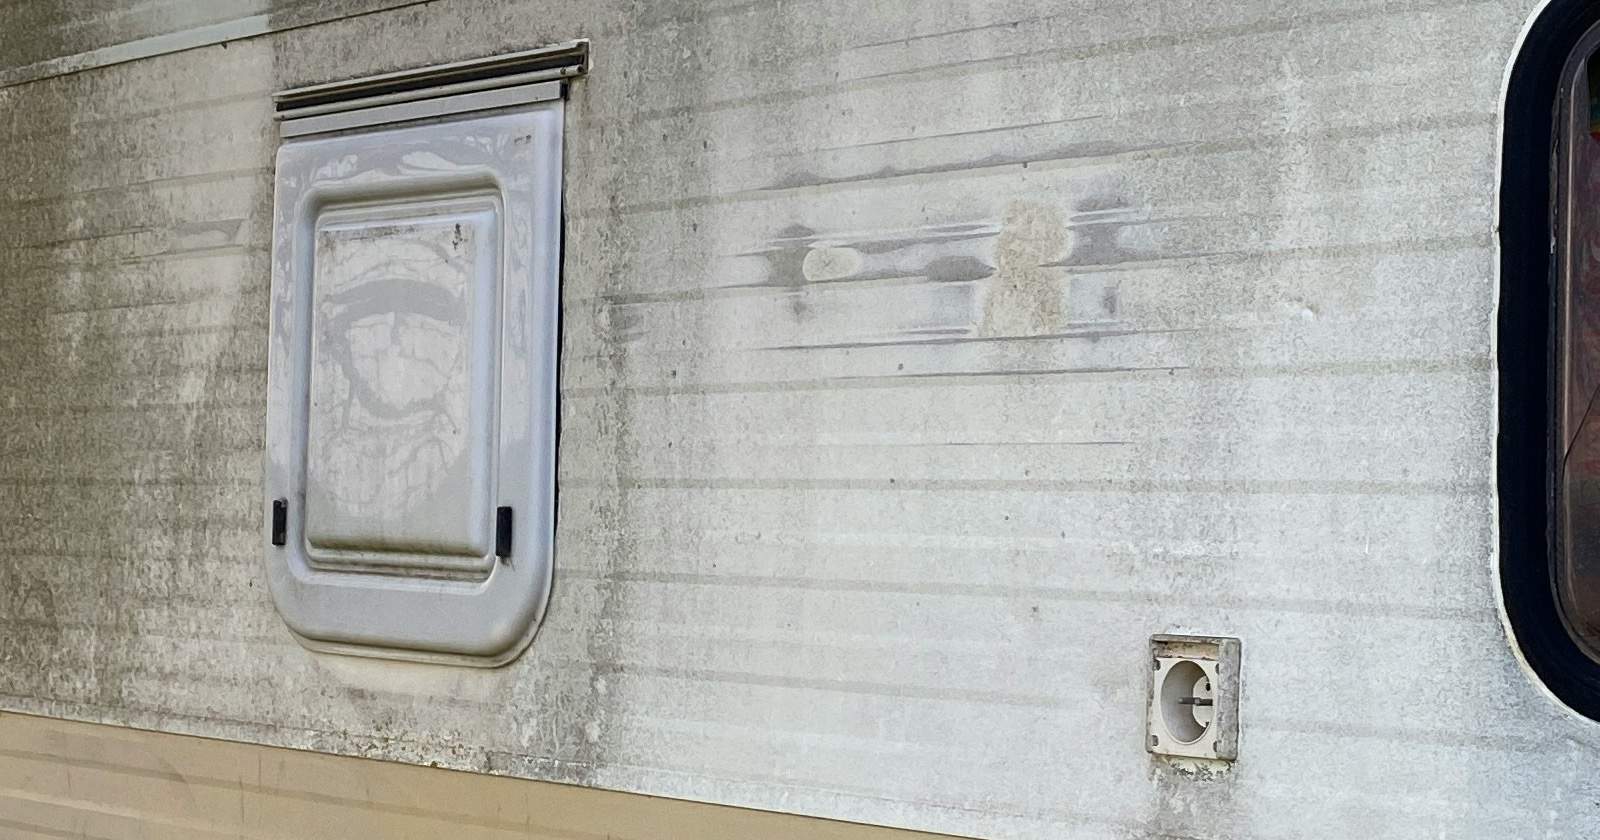
While inspecting the underbelly look for any areas that are sagging.
If you find an area that is sagging, gently push up to see if the area is heavier than it should be. Heavy saggy areas indicate water that is ponding above and has soaked the insulation. The leaking water could be from a plumbing leak or a rain leak.
- If you determine the weight is due to a water leak, cut a slit in the underbelly material to let it drain and dry out.
- When possible, cut the slit lengthwise directly under a floor support. Doing so will allow you to fasten the underbelly material in place.
- Do this once the area has dried out and the leak has been repaired. Finally, apply underbelly repair tape over the slit.
Underbelly Inspection Point #3: Exhaust System
The exhaust system of a motorhome, tow vehicle or dinghy is very susceptible to rust. This happens from moisture created during the combustion process, spray from rainwater, saltwater environments, and de-icing chemicals.
Rust can lead to components failing or holes forming. If you have been driving / camping at a saltwater beach or winter driving where de-icing is present, hose down the underside of your vehicles as soon as possible. Not only will this help preserve your exhaust system, but your frame too.
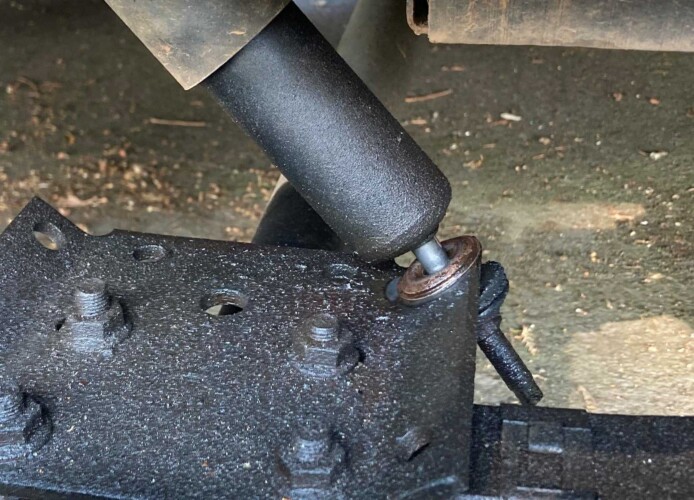
Underbelly Inspection Point #4: Shocks
Shocks are not very common on towable RVs, but all motorized RVs are equipped with shocks. When you are giving your RV underbelly care, look for the following involving the shocks:
- Fluid leaking
- Broken shock mounts
- Worn out / rotted grommets
- Loose mounting bolts
Underbelly Inspection Point #5: Back side of tires, wheels and brakes
Tires have two sides. The side facing out which everyone inspects and the side facing in underneath the RV that receives little attention.
Things to look for when you are performing RV underbelly care on your tires includes:
- Side wall damage / cracking of the tires
- Inspecting the wheels for cracks or excessive corrosion.
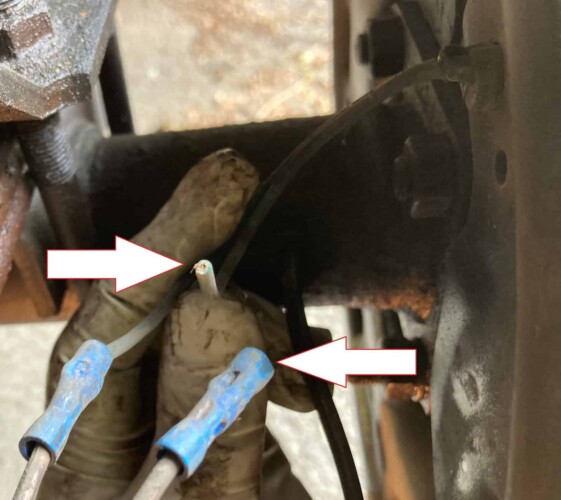
- Those with towable RVs will want to inspect the brake wires especially where they are connected to the brake magnets at the rear or the backing plate.
I recently found one of my brake wires had fatigued at the butt connector.
Motorhome owners will want to inspect the hydraulic brake lines for signs of cracks or leaks in the rubber lines.
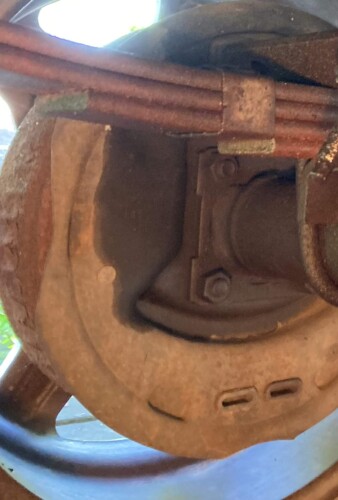
Both towable RV owners and motorhome owners will want to examine where the axle meets the backing plate for the brakes. Any oily substance could indicate a leaking grease seal. If grease is making its way through the seal, it probably has contaminated the brake linings as well.
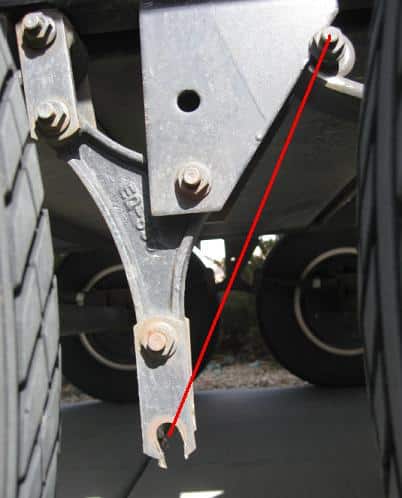
Underbelly Inspection Point #6: The Undercarriage
While you are in the vicinity of the backing plates, be sure and inspect the shackles, suspension springs, U-bolts, hangers, rocker arms etc. that comprise your suspension system.
Look for cracks, broken springs and loose bolts.
Towable RV owners will want to pay special attention to the leaf spring shackles and bolts, especially if your suspension system does not contain wet bolts.
Standard suspension (non-wetted bolts) systems are prone to the holes in the shackles. This elongates, along with them cutting into the bolts in the process. Left unattended, the shackles or bolts will eventually fail.
Note: With the bolts and nuts in place, you are rarely able to see the hole elongating until it is often too late. If you see the head of the bolt or nut is close to the edge of the shackle (no longer centered) you will know this is occurring.
Underbelly Inspection Point #7: Drivetrain
The final RV underbelly care item is the components of the drivetrain that call the underside of your motorhome or tow vehicle home.
This includes drive lines, differentials, U-joints, carrier bearing and transfer case for those with four-wheel drive.
Look for leaks and pending failure especially in U-joints, which can become “sloppy.” Be sure to service each according to the manufacturer’s recommended intervals.
Make RV Underbelly Care Part of Your RV Maintenance
Now that you know there is plenty to maintain and inspect “down there,” make sure RV underbelly care becomes part of your annual RV inspection process.
Make your annual RV inspections easy with RV LIFE Maintenance. Spend time building memories, instead of worrying about breakdowns, documents and maintenance schedules.