RVs require maintenance. Knowing when and how to clean RV roofs is probably the most important. The majority of RV damage I see as a 16 year RV industry technician comes from the roof. The culprit? Water damage from roof leaks caused by lack of maintenance. Don’t let that happen to your RV!
RVs Take a Beating. Your Roof Does Too.
RVs are the most beat-up vehicles on the planet. They endure hurricanes and earthquakes every time they roll on down the road. Remember, RVs are not as durable as stick homes. Trailers, motorhomes, and vans are all designed for livability. But RV amenities are packaged in a lightweight and functional moving machine.
Most structures move to some extent. Skyscrapers sway with wind. Bridges bounce with traffic and wind. And vehicles flex to absorb the variable topography upon which they travel. RVs are no exception. They are designed with an inherent flexibility. At the seams where major pieces of the coach meet, soft flexible sealants are required to connect walls. Up top, those sealants mate up the RV’s flexible, light weight roofing material too.
When you take all this into consideration, RVs do a pretty good job at keeping out the elements. But they can only protect your RV from weather when properly maintained.
Know Your RV Roof Types
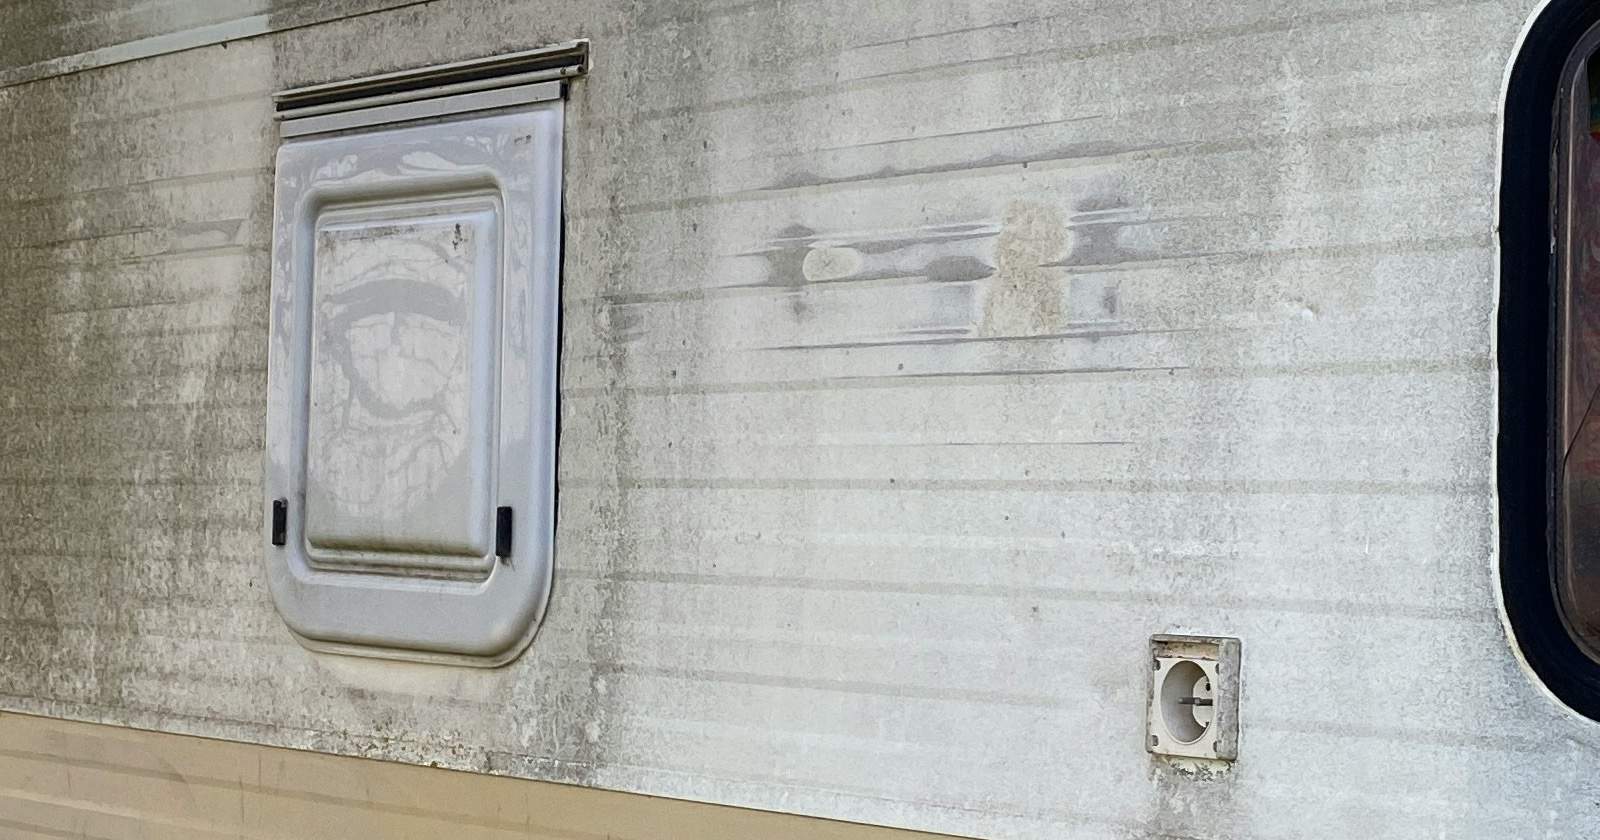
Water penetration destroys RVs. Over time, most leaky RV roofs cause the whole rig to rot and fail in one way or another. Moisture also leads to ugly problems like mildew and fiberglass RV delamination.
When RVers visit my dealership, I am delighted to see more of them asking about RV roof maintenance. Did you know that many RV service shops offer a free RV roof inspection when other maintenance is being done? Take advantage of it. The pros can tell you if RV roof resealing needs to be done.
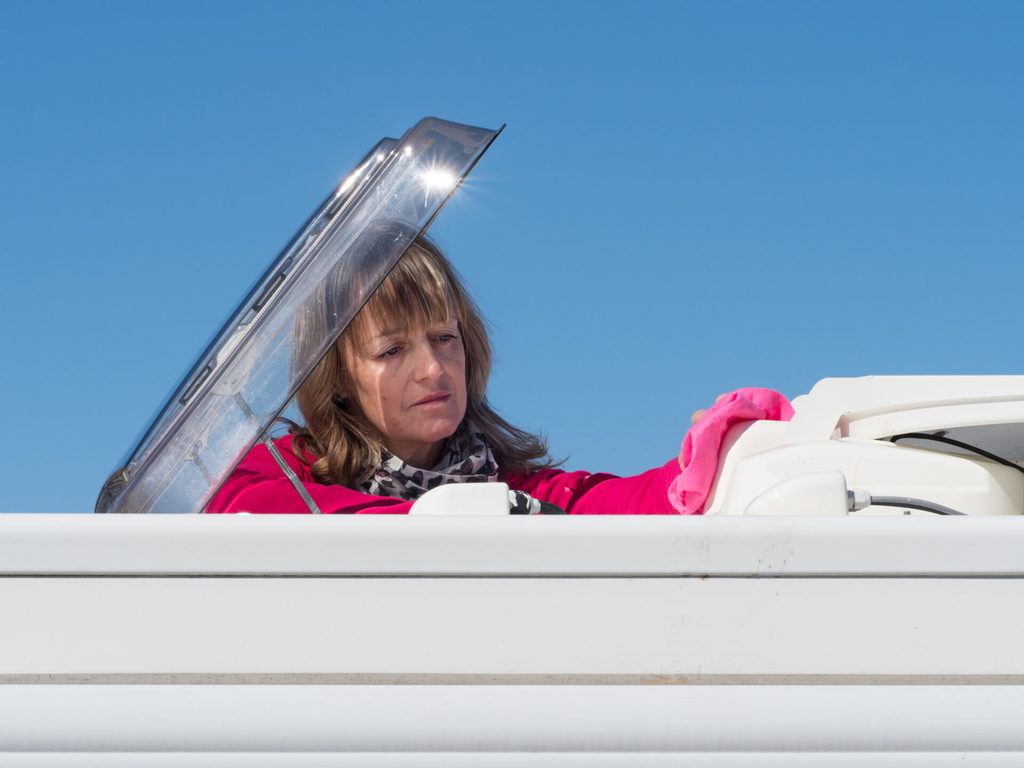
RV roof maintenance is easy enough to do yourself. Here’s the best way to inspect and clean RV roofs.
Caution! Always test your RV roof for sturdiness before walking or climbing on top. Check your manual or contact your manufacturer to find out if you can walk on your roof. Use extreme care when inspecting, cleaning, and sealing your RV roof. Especially if your roof is wet.
RV manufacturers use four primary roofing materials:
- Aluminum
- Fiberglass
- EPDM (Ethylene Propylene Diene Monomer). This is a soft-roll, rubber material seen on most RVs. Usually, EDPM is pure white with a black bottom layer. This material is smooth to the touch. When it weathers, a white powder forms as it ages in the sun. If you rub it with your hand you will get it on you.
- TPO (Thermal Poly Olefin). Similar to EDPM, it’s also rolled onto the roof. TPO is basically a plastic that comes in several colors with a textured surface. TPO doesn’t weather the same way EPDM does. You won’t have the white powder that gets on you when you work on the roof. Because TPO is a plastic, the roof is the same color all the way through. TPO roofing is glued onto the roof decking in the same way that EPDM is, but with a different adhesive.
Some RV roofs have a combination of aluminum or fiberglass, and rolled roofing material. You might have a hard time identifying your rolled roofing type. Check your RV owner’s manual to find out for sure.
Clean RV Roofs are Happy RV Roofs
Whatever lands on your roof eventually ends up everywhere else on the RV. Your RV roof maintenance job starts with a thorough cleaning.
Cleaning a TPO RV roof is easy. Use a non-abrasive, mild household cleaner, such as Top Job or Spic-N-Span. You also want a medium-bristled scrub brush.
EPDM roofing should be cleaned with a rubber roof cleaner and conditioner. These cleaners and conditioners wash away the excess ‘white powder’ from the membrane. They also seal the membrane and reduce the formation of the powder (weathering) from UV and environmental exposure.

CAUTION: DO NOT use cleaners or conditioners containing petroleum solvents, harsh abrasives or citric-based cleaners on either roof type. You may cause irreparable damage to your roof and void your RV warranty.
Choose Your RV Roof Seal and Repair Materials
RV roof seals are often covered in one of two types of RV roof sealant materials.
- Liquid self-leveling sealant. Sticks to both EDPM and TPO RV roofs and comes in a variety of colors to match the RV roof top. By self-leveling, it creates a smooth, even seal surface. Use ONLY on horizontal surfaces, not vertical ones.
- Second, is a tape product, often referred to as Eternabond. It’s a super tacky RV roof sealant with a UV-resistant white plastic or metallic coating on the exposed side. This RV roof tape requires no prep work, and creates a waterproof, airtight seal.
Get a sealant compatible with your RV roof. EPDM and TPO sealants are NOT interchangeable. Never use silicone sealant on RV roof tops. Silicone is NOT compatible with most RV roofing sealants. It also lacks the performance properties to create a watertight seal.
How to Inspect Your RV Roof
- Tears or holes in the roof material? With membrane roofing, beware of small slices that can allow water intrusion. Get any holes or slices fixed immediately.
- What is the general condition of the membrane? EPDM roofs that start to show black through the white are at the end of their useful life. They should be replaced.
- Any large wrinkles or bubbles? These can be OK, but monitor them for size changes.
- Do you see bumpy areas under the roof material? Many RVs use OSB for their roof decking. OSB is made of strands of wood glued together. This material is susceptible to water intrusion and will swell, leading to bumpy, raised areas. If you have them, it’s an early indication of a leak. Quickly address any bumpy areas. Removing a section of the membrane and allowing the decking to dry, or replacing the decking altogether, is recommended.
- Check for roof nail punctures. Some RV manufacturers use nails to secure roof decking. Over time, flexing causes nails to back out and punch through the roof membrane. If this happens, it may be necessary to cut the roof membrane at the puncture site to make proper repairs.
- How’s the sealant condition? Self-leveling sealants are used around everything built into the roof. This includes antennas, vents and the terminations at the front and back of the coach. A similar sealant is used on the sides of the roof, but it is not self-leveling. Look for peeling, cracking or openings in the sealants. Weathered RV roof sealants should be cleaned, dried and resealed. Use mineral spirits on a rag to clean the sealants if they remain dirty after washing the roof. If you believe moisture and dirt have gotten under the sealants, they should be removed and replaced.
Aluminum and fiberglass roofs use their own RV roof sealants. Many of them are self-leveling, or they use RV roof sealant tape. If you have this type of RV roof, check your coach’s owner’s manual for RV roof sealant recommendations. Certain manufacturers (like Winnebago) have specific sealant requirements.
More RV Roof Maintenance Tips
Clean the RV roof and keep all the seals on your RV maintained, and you’ll do a lot to help maintain the long-term value of your unit. But don’t stop reading yet. There’s a few more critical RV roof maintenance tips to remember.
Make an RV roof emergency repair kit.
Here’s what to include:
- One tube of your RV roof sealant
- Caulk gun
- Emergency repair patch or roll of microsealant type tape (Eternabond, Dicor or other brand)
- A tarp
Quickly remove leaves, pine needles and other rooftop debris.
Anything that collects on the roof or RV slide out roof can hold and wick water into lesser protected areas. This causes extreme damage. Consider installing RV slide toppers to keep this debris off the slide out roofs and out of the slide out seals and keeping the rest of the roof clean and debris free.
Annually inspect RV air conditioner roof connections.
A/C units are sealed to the roof with a large foam seal. Four bolts secure it to form a compression ‘sandwich’ between the exterior and interior A/C compartments. Check annually for proper tightness. Do it sooner if leaking is suspected. Refer to your air conditioner’s manual for tightening instructions. Or have your RV service center perform RV air conditioner maintenance for you.
RV roofs and sealants should be inspected every six months. Cleaning can be done at about the same frequency. Do it more often if the roof is exposed to more elements like harsh weather or high air particulate matter counts.
With a little bit of preventive RV roof maintenance, RVs can provide many years of enjoyment. As a bonus, clean RV roofs slow RV deprecation. Taking time for maintenance now always pays for itself in the future.